Supplies Needed:
Felt (whatever colors you desire)
Sewing machine (or needle and thread if hand sewing)
Hot glue gun
Old t-shirt to coordinate with your colors for the band
Here is the pattern I created; there are two different styles to choose from. Download, print, cut out, and what you have should look like this:
Next I cut out the long felt heart string and the single hearts to look like so:
Next I took one of Bubby’s old white under t-shirts and cut a small (1/2 inch) strip, then I cut that in half and stretched it a little to make the side curl in a little. Make sure to measure for the size you need. Remember t-shirt material is very stretchy keep that in mind when sizing! The first one I made Stinky Face could was a little too big and kept falling down. Below are some pictures of this process:
Then take on over to your machine or hand stitch the t-shirt strip onto the top of your string of hearts (so when looking at the top of this piece the strip would be on the underneath).
Next we are going to need to plug in our glue gun for the remainder of this project. Now you are going to glue your top heart string and bottom heart string together. Your white t-shirt strip should now be sandwiched between the felt and not seen! Then we are going to glue on each individual heart. At this point I shaped them some making them look just right to glue on. The four heart string went on without overlapping any, however the three heart string I firsts placed each end heart on first and then the middle heart on overlapping the two end hearts like so:
Next we are going to make little rosettes to go in the center of each heart. I started by cutting strips of felt. Then keeping a little tail on the end I twisted and wrapped the felt around for form the rosette. Like so:
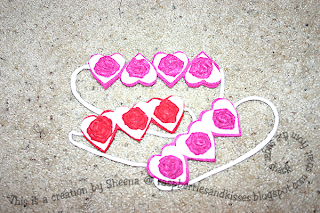
Now you just glue on your rosettes making sure to adhere it well. Your finished headband should look like these. You can really do so much with these and what is great if you have a big headed little one like Stinky Face (love her) it does not squeeze the head at all!
Now adore your creation on your little one and marvel at how cute she is and how much you love her!
Happy Valentine’s Day!
Linking to:


I love this project, Sheena! Plus, the kids are super cute! :)
ReplyDeleteThanks, Amanda! I'm just lucky I can get Gracie to wear it for a short time. She looked so cute in it! The were super easy too!
ReplyDelete