Sunday, June 19, 2011

Daddy’s Day

I hope everyone enjoyed spending Father’s Day with that special guy in their life! I know I enjoyed spending the day with both of mine (Dad and Husband). Of course I always enjoy spending time with my family, but days like today give me the excuse to craft something for them too. I blog hopped all week looking at all of the cool ideas everyone else was doing and I meshed my own idea into something of my own! First I would like to share with you the awesome present I received for Mother’s Day. Can I just say I think my craftiness has rubbed off on my hubby as he has really come up with some great ideas over the years for me. How lucky am I he understands my value of homemade memories rather than store bought stuff! This was made using my kiddos hands and fingers!

Okay, while I wish I could remember the link for where I saw this idea alas I do not. The only difference for mine was I was a little cheaper. I could have purchased a three slot picture frame for my finished project; however I chose to create one. I purchased (3) unfinished 4 x 6 wooden picture frames at Michaels for $.66 each (they were on sale), also a steak stick which I purchased for $.99 back in the unfinished wood section as well. First I painted all the edges of the frame inside and out. Next I traced and cut the frames out of scrapbook paper and modge podged the paper frame to the wooden one. I purchased two letters “D”& “A”, which were on sale for $.99 at the Hobby Lobby. I spray painted the letters one light and one dark. I took pictures of the kids holding the letters different ways up against a brick wall. I then took the best ones and photo edited them slightly, printed, and placed in the frames. Next I glued all three frames side by side across the stick. For the “DAD” frame I have not yet added the ribbon. However, for my Dad whom we call “PAP” I attached ribbon to the back so that it could be hung. I also decorated the front of the frames with scrapbook stickers which best fit each recipient. I am totally happy with the outcome! You can really do so much with this and it was a pretty inexpensive project, which we will be able to lovingly adore forever!


Lastly below is a picture of my oldest that I snapped when we were doing our pictures for the craft. I adore her, although I will openly admit she is a pain 99% of the time.

Happy Blogging!

Friday, May 20, 2011

Unique Birthday Wrapping

I seems we can go all year only being invited to one or two birthday parties, then all of the sudden May comes and they come in a flood!! Let me just say I “LOVE” Etsy! I love a handmade item over a store bought item any day. For starters they are original, and chances are no one out there is going to have one exactly like that! So, naturally I just like assuming everyone else would appreciate the same kind of gift. I always like feeling like I put more than just a trip to the store into my gift…I mean my kid’s gifts. (smile) Last weekend I made a gift for Silly Whims friend like one I have made before the nail box kit as seen in this post. Additionally, I made her friend a t-shirt, which really fit her personality. This weekend both Silly Whim and Bubba have parties. While I did buy both gifts I wanted to add that touch of personal to them, so for Silly Whims (one of her best friends) I had a picture from Silly Whims Spa-rific Sleepover, which I hope to post on soon. I took the picture and created an iron on design. I also used Steam-a-seam (love that stuff) to create fabric appliqués of her name. Additionally, I used spray paint to create a splattered paint look and went over my appliqué with fabric pain. I started with these a 3 pack from Wal-mart was $6.97, and everything else I already had!

Below is the finished product:

Next for Bubba’s friend, whom I will say we don’t know that well I created an appliqué of race car and his name on the bag. (appliqué is indicative of contents) Bubba is going through a car phase right now. To create an appliqué I simply print out whatever design word I want to use then flip it print side down and trace over my light box onto the steam-a-seam. Next I peel off the side that is NOT traced on and place it on the WRONG side of my fabric. See below:

I gently press with an iron to seal together, and then cut along traced lines. I arrange how I want it all to look on whatever item I have chosen to place it on then remove the last piece of paper from the steam-a-seam and iron on for my permanent look. I also used the spray paint for this as well. This bag turned out like so:

Both bags stuffed and fluffed:

I’m probably over estimating others appreciation for this type of stuff, but it makes me feel better and honestly you spend just as much maybe even less than you would have if you purchased a bag!

Have a great weekend!!
Photobucket

Thursday, May 19, 2011

Toilet Seat Sweet

Interested in the title of this blog post? Keep reading to find out what it is all about! Honestly though I was rather embarrassed to post after having gone for such a long time in between postings. I long to be that person who posts several times a week, I suppose to become that I may have to settle sometimes for just simple posts. That leads us to today’s posting “Toilet Seat Sweet”! I have come to accept sometimes the simple things in life are what be me joy. We have been needing new toilet seats in all of our (3) bathrooms for some time now, so I was excited when I was meandering through Home Depot not too long ago and saw these ditty’s .


Having a 4 almost 5 year old boy toilet seats can really mean a lot! You can imagine my excitement when I can get the Whisper (No Slam) Close toilet seats for $9.93 (originally $39.97). So, I pretty much got three for the price of one! Gotta love it when that happens!! While that was almost enough excitement for one day I had also searched the internet for some type of seat handle for any size boys to use when lifting and lowering the toilet seat! That is when I came across these:

http://www.theshandle.com/

These have to be the coolest seat handles every. Such a simple idea I actually wish I had thought of it! Alas I did not; I did invest in three handles. These are great not only do I feel better about my little man lifting the seat and not touching the gross seat! Added bonus is the reminder on BOTH sides of the handle reminding little ones to wash their hands! These are super easy to install, the seat does need to be flat on the bottom of the seat. This is what mine look like installed. They have several designs to choose from and some neutral ones. I have three different ones.


My Whisper Seat in action (teeheehee)


Please note this is NOT a paid promotion I have not been asked to review these, however as a mother of four I always like hearing about products out on the market that make life a little easier for moms! I am just simply sharing with you what I found that I like and works well for me. This may not be the case for you; however I hope you found this useful!

Photobucket

Friday, April 22, 2011

Good Friday

Today is a very special day as it is the day that Jesus died for our transgressions so that we could be forgiven. I for one am very thankful for all that he sacrificed for me. It is sad that I did not truly understand the meaning or the word of God until I was older. I am very fortunate to have a husband who has taken it upon himself to ensure that myself and our children completely understand and give thanks daily. This evening after dinner and getting ready for bed we sat as my husband read from the Bible the meaning of Good Friday and Easter. It is important that our children understand Easter Is more than just baskets, eggs, and candy. Silly Whim asked plenty of questions! Afterward my husband, La (my 16 year old) and myself watched “Passion of the Christ”, which in my opinion is a very moving movie. I cried like a baby the first time I saw this movie! If you haven’t seen it I strongly recommend seeing it at least once in your life, though I do not recommend it for young children.

Now onto a little of what I have been up to lately. I have not posted much lately, but I have been busy trying to finish up some projects started some time ago. A friend of La’s had a baby back in December. She graduated last year so she is a young mother. Having had La when I was 18 I empathize with being young and starting your family, it’s was not easy, but it was part of my life that brought me here. So when her friend’s daughter was born I had said I wanted to make her a blanket. It took me a while, a long while, but I finally finished! Below are the things that I made her. I am very happy with how things turned out. As a young mother I hope she appreciates them, I know I would have had someone made them for me when I had La!
This is everything that I made:

This is a closer look at the blanket and matching onesie:

Then of course I made this cute little onesie dress for Easter:

Lastly I made this cute one. The “C” is her initial. I found this ruffle material on clearance at my Joann’s. I plan on making Stinky Face a skirt with this same material!

Well, that is just one of the little projects I can now mark off my to do list.

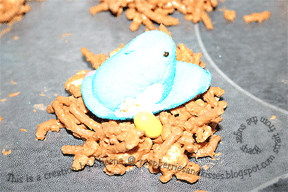
Oh...and a week or so ago I ran across a really cute little snack, which of course I do not remember the link to, however I jotted down the recipie and made the for Bubby's preschool Easter celebration the other day. They were so cute. Definitely a make again!
Here is a closer look at these birdies and their nest...so cute!

I pray that you all have a blessed Easter and remember why you are here, by his grace.
God Bless.
Photobucket

Friday, April 8, 2011

You were an amazing woman!!

I will start by taking a moment to say this week has been a little hard for me. This week I lost my last living grandmother. While I am very sad at her passing in a way I am relieved that she did not have to suffer long. My grandmother found out about two weeks ago that she had a rare form of blood cancer. As strong as my grandma was I know she was scared. My grandma lived an amazing life! When I look back through my life I have so many treasures she has made for me and my children in her lifetime. It is amazing that she was always there whenever someone got married, had a child, or was sick she always managed to just show up. She has traveled, written books; she was a girl scout/leader for so many years she was recognized for her services! She was my Girl Scout leader for several years. She drove until just recently. My grandma was just simply an amazing woman and if I live even just ½ the life she did that would be an accomplishment! Below is a picture taken when Stinky Face was born:


Now that I have shared that I will share the spring wreath that I have been working on. I purchased a green foam ring wreath at Goodwill a couple of weeks ago anticipating making this and just recently was able to get to it. Everything else I had on hand. Below you will see my supplies (glue gun not pictured). You will notice I already wrapped the wreath.

Next I spray painted my push pins used to hold my flowers (circles) together.

The rest is not really pictured in detail; however I had three circle patterns that I used to give a layered flower look. The smallest (yellow) on top was pinched slightly as I pinned it. I wasn’t completely satisfied with it so I added rosettes in burlap and the blue floral fabric to fill it in. I like a cluttered look (this is where my husband laughs and says, “Yes she does”). So below is the look I settled with:

Then I used my yellow fabric to sew a little strip for hanging the wreath and my final product turned out like so:

Silly Whim likes it, so it must be good.

I’m linking up with some of the links in my side bar.

Have a great weekend blog land!

Photobucket

Friday, April 1, 2011

My NOT so lazy days….

I’m still alive!! No my dearest friend Allyson I have not hot glued myself to anything…YET! I really have just been BUSY! I actually have several projects/blog posts in the works I would tell you, but to be honest I want you to come back and check me out! Let me tell you it’s not easy to have your camera with you literally everywhere. My camera has so many pictures on it all working towards projects not yet finished! I have completed a couple of things though. One project I completed recently was two pillows for girls “Brownies” who have been with our troop since they were daisies whom are not moving. I wanted to come up with something special that they could take with them to remember their troop and friends. The pillow itself was pretty simple and the girls loved them. Below is one of the pillows just after I finished it.

This was the pillow all signed by the troop!

For my next project I ask you to please keep in mind I am jack of many trades, yet master of none! I say this because my idea of sewing is winging it! Yes, I can sew kinda sorta some! I love sewing and being able to make my kiddos clothes and dresses and pillows and whatever else I might be able to imagine up, however if you look in close detail at my projects you will definitely see my flaws! Hence why my 16 year old does not request I make her stuff and since I was so young when I had her she really didn’t get the crafty side of me so I think we are both okay with it. As for the rest of my kids I wanted them to be able to look back through their childhood and remember that mommy always made them things. I’m all about making memories, which leads me to my next pillow…still sticking with my scouts theme. We all have them….old uniforms. When I moved my mom gave me my old Girl Scout vest some patches sewed on and some in an envelope not sewed on. Let’s face it I am never going to really do anything with it and my hubby gets rather irritated when Bubba (5) dances around with it on. He will be a Boy Scout soon enough. Well Silly Whim bridge up from Daisies to Brownies last year and recently I finished making sure all of her patches were assembled on her tunic. I wanted her uniform to have more of a purpose though rather than just sitting in some box stowed away for nothing more than just to show her kids someday. So I decided to make a pillow from it. The idea started rather simple and grew a little bit. I started with this:

Next I made sure the tunic was lined up nicely and then I cut the shoulders off strait across the top. I followed this up by trimming the trim all the way around like so.

Since I had to cut her troop numbers and flag off I needed to sew them back on. I also decided to use pictures from her years as a Daisy and using iron on transfer put them onto fabric. I then framed each picture using ribbon.

After all the pictures were in place I used the freezer paper stencil to put the years she was a Daisy. I also used some glow in the dark fabric paint to do some writing around some empty spaces. I then cut some strips of lavender fabric and created a trim and pinned it in place.

Then I just sewed the pillow up and ta da!! Done!! I really like how it turned out! Mind you it is NOT perfect, but I’m okay with that. I hope that Silly Whim can look at this and remember all the fun time she had as a Daisy.


Now to try and thing what I am going to do with the Brownie vest. Aw..I still have another year…plenty of time!

I'm linking up to Project CSI this week and some others in my side bar!
Visit thecsiproject.com


Photobucket

Friday, March 18, 2011

St. Patty's Day Recap

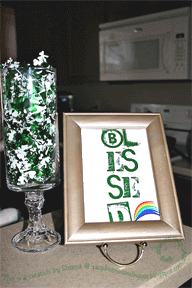
I hope everyone had a Happy St. Patrick’s Day! I know it seems as though I have not posted much here lately and to be honest the time change has really taken its toll on me! Who knew one hour could wreak so much havoc! I will say though I have been doing little things here and there ideas of course that I have seen raiding blog parties. I’ll start by showing you the little bit of St. Patty’s Day decorations I did have up. Below is a picture of a mini apothecary dollar store jar. I had seen several people do this and I really liked the idea that it is small. I LOVE apothecary jars, but they are just too big for my house. I needed one that fit my space and who could argue it coming from the dollar store! These were made using a vase from the dollar store, a candle holder, and my favorite glue E6000. Assemble just like the thrifty cake plates. The garland was also purchased at the dollar store. Also picture here is a thrifted 5x7 frame purchased for .99 at Goodwill and spray painted with my new favorite color Krylon’s Brushed Metallic Carmel Latte, then I filled it with a cute little printable I found blog hoppin here. Love it!
Photobucket


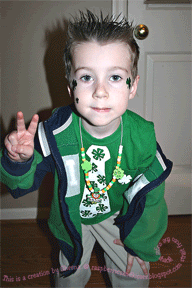
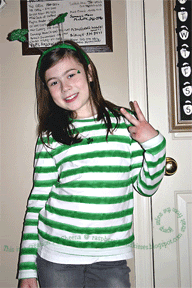
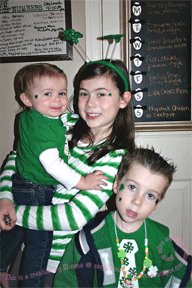
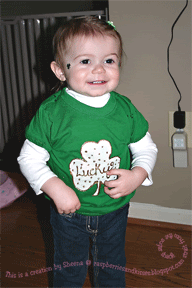
Then of course I shared Bubba’s shirt with you, however I never came back with Stinky Face’s shirt. That would be of course because I finished it St. Patrick’s Day morning around 1:00am. Yes, I am that person that thrives off last minute projects, what can I say? I had purchased both Stinky Face and Bubba the same shirt, but to make Stinky Face’s shirt more girly I added elastic to the sleeves and bottom of the shirt to give it a puffy bubble look. Then I freezer paper stenciled a shamrock on the front and outlined it in gold glitter writing “Lucky” in the center. Below are a couple of shots of my kiddos decked in green. Of course Lolli being in High School is gone before most of us get going in the morning and she doesn’t wear much of anything I would make her anymore so she is missing from the picture!
Photobucket


Photobucket


Photobucket


Photobucket


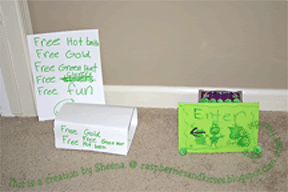
I have to say I love that my Silly Whim (8) is still whimsical. Yes, while many children in her class no longer believe in Santa, the Tooth Fairy, the Easter Bunny, or Leprechauns my Silly Whim has not let them kill that for her! Last night before going to bed she worked very hard on her Leprechaun trap, as seen below:
Photobucket


Every year we like to mess her stuff up a little and leave a note from the leprechaun. We even go as far as to burn the edges around the paper, which is pretty tiny. We then roll it up and tie it with string. I also made these awesome treat bags I saw at Karen’s Ideas Galore and filled them with gold rolos!!

Bubba woke up St. Patty’s Day morning 4 or 5am I don’t know exactly I was sleeping. He was scared and swore he heard voices. Well, eventually I was able to get him to go back to bed. Then when he woke up that morning and saw the Leprechaun Gold, he immediately came up with the notion that was who he heard last night and that the Leprechaun was sniffing him! What?? Love it! Then Silly Whim was all smiles this morning when she saw what had happened. Yes people she has already started thinking of her design for next year’s trap. Love her!

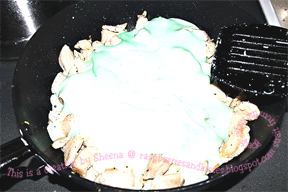
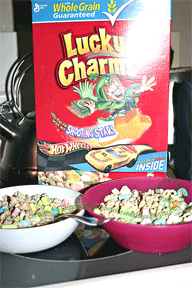
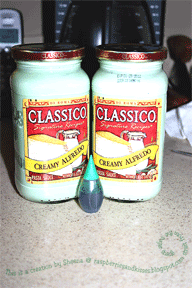
The day could not be complete without ingesting a year’s worth of green food coloring.

Breakfast – Lucky Charms w/green milk
Photobucket


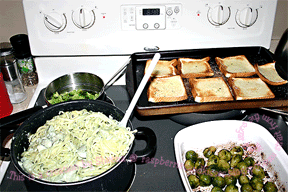
Dinner – Green Chicken Alfredo, Broccoli, and Roasted Brussels sprouts (YUM)
Photobucket


Photobucket


Photobucket


Photobucket


Dessert – Girl Scout Cookie Thin Mint Milk Shake (So..so..GOOD) and St. Patrick’s Day cupcakes from Food, Friends, and Fun, and let me just say these were awesome! You can't really tell from the picture, however the icing is green and the pudding mix in the cupcakes made the cupcakes green too! I will definitely being making more cupcakes using pudding as these were really moist and yummy!

Photobucket


Well that was our St. Patrick’s Day! How was yours? I would like to leave you with this poem:

May your day be touched
by a bit of Irish luck,
brightened by a song in your heart,
and warmed by the smiles
of the people you love.

Till next St. Patty’s Day…Top of the morn’in to ya!

Happy Blogging!